

The once worn trail, now a dirt road, that was going to lead to our new house.

Brad was able to use the equipment from A.S Clark and Sons-the excavation company where he worked.

The foundation is dug.


Putting in the footings.

Footings and bracings for the house.


Brad's "homemade" chute for pouring the stone in the foundation. (I believe it was very creative.) The important thing is it worked!


Carroll Concrete truck-getting ready to pour the concrete in the footings.


The concrete is poured in the footings.

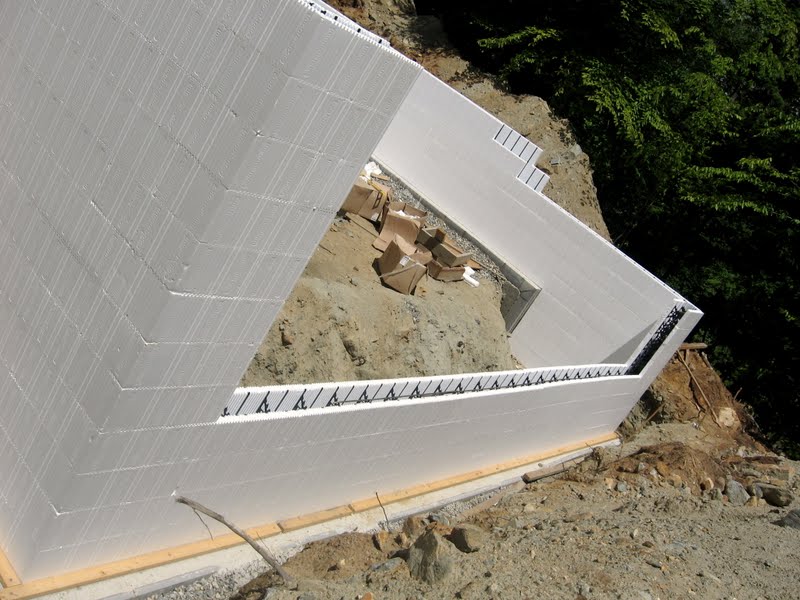
What a mess! We used the Integra-Spec insulated forms to build the walls. Brad described it as pretty simple to use and that these insulated forms went together like legos.

We put rebar and webbing in to help brace the walls.

Some pictures of the walls.


Once the walls were so high we used a ladder to put the webbing and the rebar in the insulated forms. These were used for extra bracing. The kids and I helped by doing an assembly line to hand Brad the plastic webs and rebar.

Bracing the walls.

We had Carroll Concrete pour the concrete for the walls as well as the footings.

Pouring the concrete.


Pouring and smoothing it out.

The bulkhead to our basement.


We had to put this black stucco all around the walls before we backfilled the foundation. It was pretty messy.


Her is a picture of the basement after the insulated walls were poured and back -filled. This is the entryway/walk-out to our basement.


The concrete has hardened.

The corner side of the basement.

Pouring the concrete for the floor.


The floor is poured.

Framing the rooms in the basement.


Framing up the walk-out.


After we finished putting up our roof, which will someday be the main floor, we put a pond liner tarp over the roof. Here is a picture of Brad and the kids on the backside of the house. (We were taking a break for lunch in this picture.)

Drying the pine boards.

Cutting & Planing the boards.


A picture of the kids going down the back stairs.

Weston loved riding on the smooth, concrete floor.

The following winter we were able to put a walk-in over the bulkhead stairs and took off the bulkhead. Here are some pics of Brad working on this project.


Here is a picture of one of our many bon fires.


Right now I will show you the outside pictures of the projects we are working on. ( Inside pics of our basement will come later) The most recent outside project we are working on is the porch. Brad is planning on putting a porch up before he builds the log cabin. He says it will be easier to put the logs on and walk around the house if we have a deck around it. The deck will become a porch eventually when we put our roof on the house. Here are some pics of Brad starting on this project.

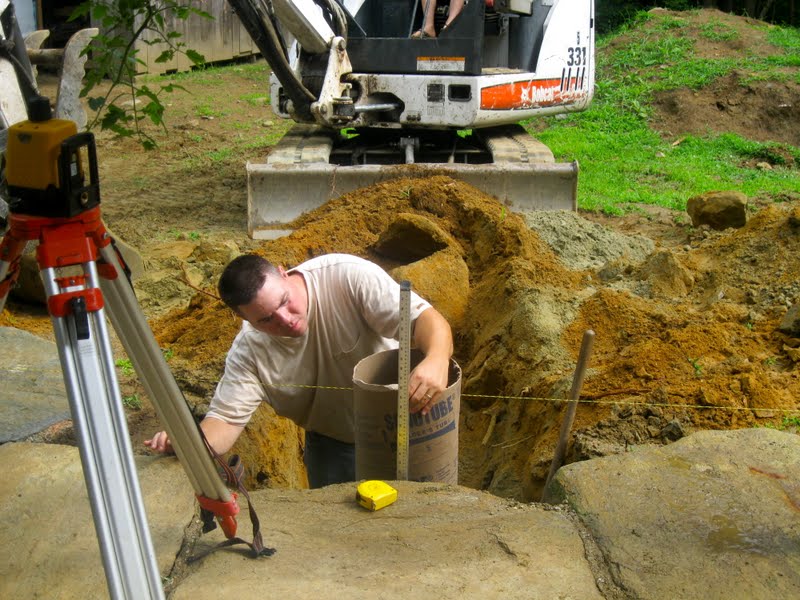
Brad digging the first hole.


Taking measurements.


Weston tries out the excavator!

He thinks he is "Big stuff."

Brad is in deep thought.

Look at this rock!
Brad dug this hole so deep and so wide. This was the fifth hole out of thirteen holes that he dug. And the largest rock that he came across.

He almost had to dig up half the yard with this hole. LOL

Look how close he came to our stone patio. It was a good thing we did not have to go under those rocks, in order to dig the hole deep enough. Brad was able to get under the rock enough to set the foot in for the sonotube.

Setting the sonotubes and filling the holes back in.


Here Brad is finishing up the last few holes.


Brad rented this Bobcat for two days and had to complete 13 holes to put the sonotubes in for the porch. He did a great job and finished with some time to do a few extra projects as well.

One of the projects was starting on another flower garden. Look at these rocks! They are not going anywhere. Some of them weighed almost as much as the excavator- if not more!


A view from the other side.

That is amazing! Building your whole house by your own hands! So many great memories for your children.
ReplyDeleteThanks for sharing!
This is so neat - thanks for posting it.
ReplyDelete